
What a setup needs
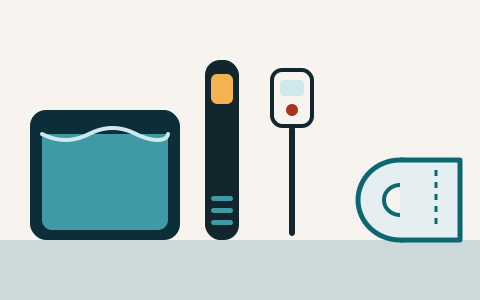
A home sous vide setup has four working parts: something that heats the water and holds it at a set temperature, a container for the water, bags to keep the food sealed and dry, and a way of checking temperatures that does not depend on the heater itself. Around those sit the ordinary kitchen basics that food-safety guidance always relies on: clean hands and surfaces, a refrigerator that is cold enough, and a plan for anything you will not eat straight away.
This guide describes equipment by type only. The handbook is not affiliated with any appliance maker, does not test products and does not recommend brands. Whatever you use, the maker's instructions for that device come first, especially on electrical safety, water levels and cleaning.
The heating device
Home setups usually use one of two kinds of heater.
- Clip-on circulators. A stick-shaped device clips to the side of a pot or tub. It heats the water and moves it around so that the temperature stays even throughout the container.
- Self-contained water baths. A box with its own built-in heater and a lid. Some move the water; others rely on the water to even itself out.
Either can work. What matters for safety is that the device holds the water at the temperature you set, that the water moves or mixes well enough to avoid cooler spots, and that you can confirm the temperature with a separate thermometer. A device that reads 145°F on its display but holds the water a few degrees lower would leave food short of the FSIS safe minimum internal temperature for whole cuts of meat, which is why the independent check below matters.
The container
The container needs to hold enough water to cover the food completely, with room for the water to move around each bag. Food that floats above the waterline, or bags packed so tightly that water cannot flow between them, will heat unevenly. A lid or cover helps the water hold its temperature and reduces evaporation on longer cooks, which matters if the water level could fall below the minimum the heater needs.
Use a container that is meant for hot water and food use, and stand it on a heat-safe surface. If you use a cooking pot, it can also go on the hob for searing once the cook is done, but keep raw-food bags and the finished food apart on the counter while you work.
Thermometers, and checking them
A food thermometer is the one piece of equipment the government guidance on cooking temperatures assumes you have. FSIS describes several kinds of food thermometer, including digital instant-read thermometers and thermometers that stay in the food while it cooks. For sous vide, a thin-probed digital thermometer is a practical choice: it can check the water, and it can check the centre of a cooked piece of food after it comes out of the bag.
Use it in two places.
- In the water, before the food goes in, to confirm the bath has reached the temperature the heater claims.
- In the food, at the end, in the thickest part and away from bone, fat and gristle, as FSIS advises, to confirm the food has reached its safe minimum internal temperature.
Thermometers drift, and a thermometer you have never checked is a guess. FSIS describes checking a food thermometer in ice water: fill a glass with ice, add water, stir, and put the probe in without touching the glass. It should read 32°F (0°C). If it does not, adjust it if the model allows, or account for the difference, or replace it. Do the same check with the heater's own reading by comparing it with a thermometer you have just tested.
The refrigerator is equipment too
A lot of sous vide cooking involves food that is chilled before it is cooked, after it is cooked, or both. FSIS advises keeping the refrigerator at 40°F (4.4°C) or below, and using an appliance thermometer to check it, because the dial setting on a refrigerator does not show the actual temperature inside. An appliance thermometer is a small, inexpensive item that sits on a shelf; it is worth having before you start cooking food to store.
If you plan to freeze cooked food, the same FSIS guidance on cold storage applies to the freezer, and the chilling and storage guide covers the figures.
A clean start
FoodSafety.gov sums up home food safety in four steps: clean, separate, cook and chill. Sous vide adds bags and a water bath, but the first two steps are unchanged.
- Clean. Wash your hands with soap and water before and after handling raw meat, poultry, seafood or eggs. Wash cutting boards, knives and counters after they touch raw food.
- Separate. Keep raw meat, poultry and seafood, and their juices, away from food that will not be cooked further. When you seal a bag, keep the opening clean, and do not let raw juices run onto plates or tools you will use for the finished food.
The bath water is not a cleaning step. If a bag leaks, treat the water and the container as having been in contact with raw food, and clean them before the next use. The bags guide covers sealing and leaks.
The bags themselves are covered there too. In short, the FDA regulates materials meant to come into contact with food, and those materials are reviewed for a particular intended use, so a bag should be one its maker describes as suitable for cooking at the temperature you plan to use.
Thawed or frozen food
FSIS describes three safe ways to thaw meat and poultry: in the refrigerator, in cold water, or in the microwave. Thawing on the counter is not one of them. In cold water, the food should be in a leak-proof bag and the water changed every 30 minutes so it stays cold. Food thawed in cold water or in the microwave should be cooked straight away.
FSIS also says it is safe to cook meat and poultry from frozen, with the cooking taking roughly 50 percent longer than for thawed food. That figure is given for cooking in general, not for water baths specifically, so treat it as a reminder that frozen food needs noticeably more time, and use the thermometer, not the clock, to decide when it is done.
Example: a setup checklist
Worked example
An illustrative checklist a cook might keep by the stove. It describes no particular product or kitchen.
- Refrigerator appliance thermometer reads 40°F or below.
- Food thermometer checked in ice water this month and reads 32°F.
- Container on a heat-safe surface, water above the heater's minimum line, cover ready.
- Heater set; water temperature confirmed with the food thermometer before food goes in.
- Hands washed with soap and water; raw food prepared on a separate board.
- Bags rated by their maker for cooking at the planned temperature; openings kept clean when sealing.
- Plan written down: eat now, or chill quickly and store (see guide 05).